Sunday
Crustless Quinoa Quiche
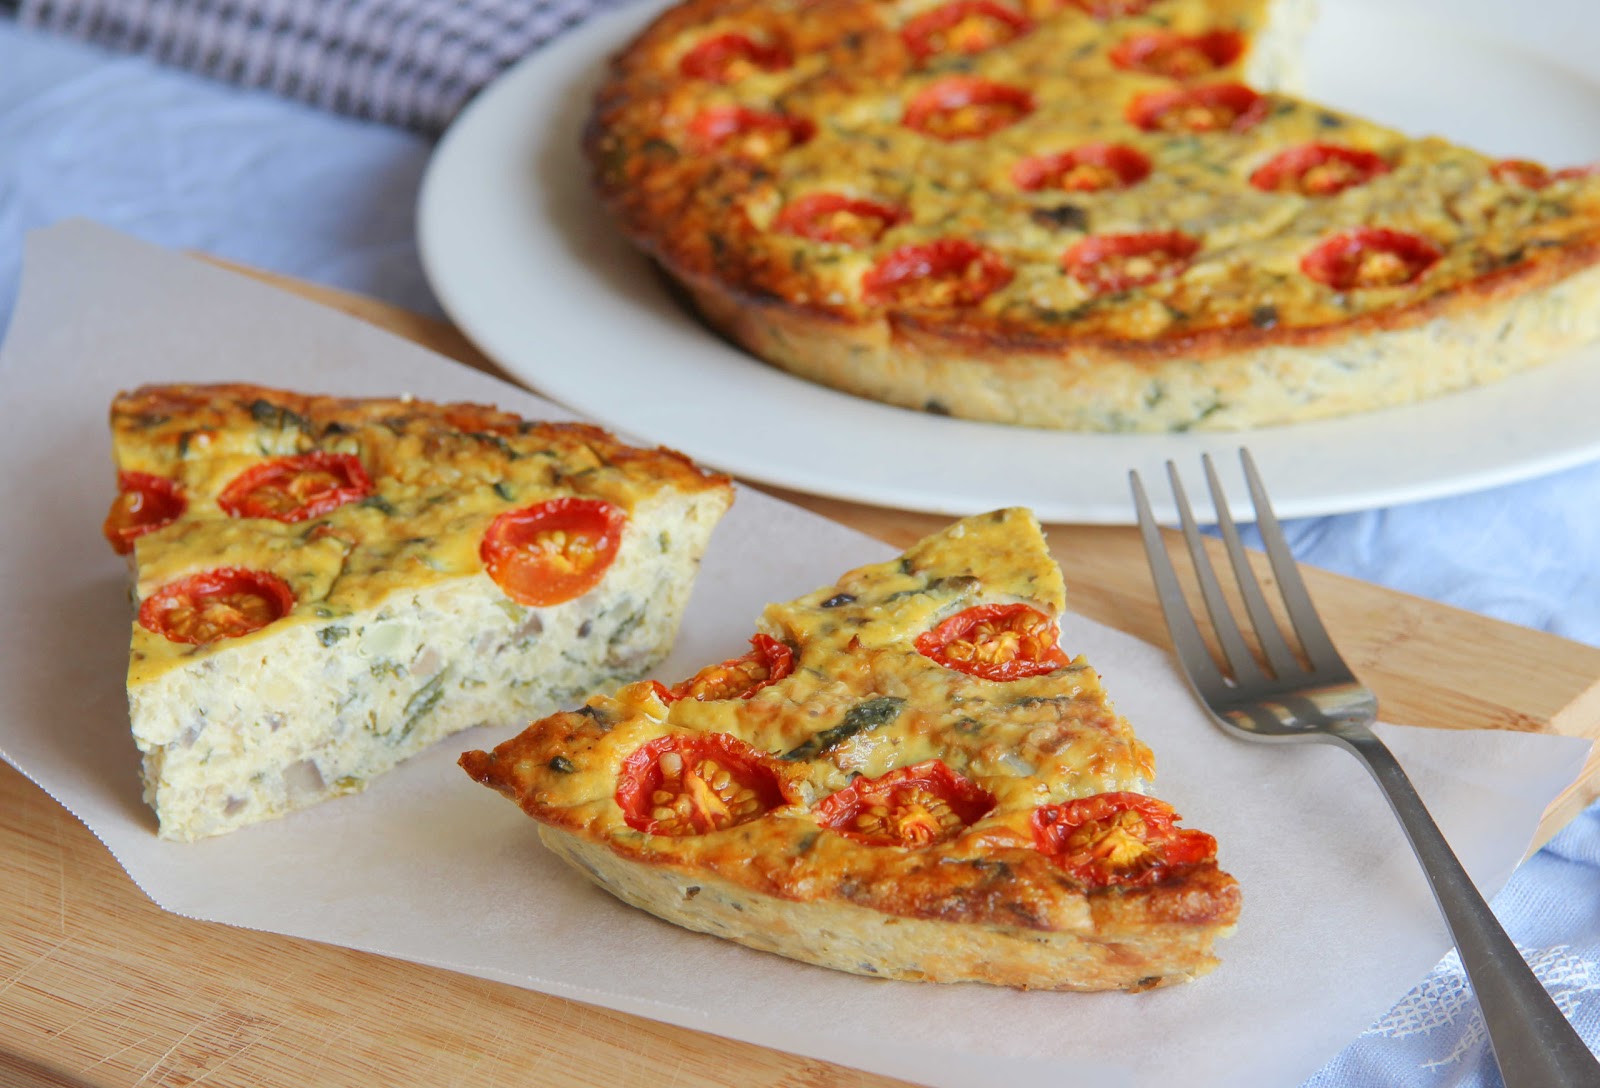
This crustless quinoa (pronounced keen-wah) quiche is wonderful for breakfast, brunch, lunch or dinner. It is equally enjoyable cold or hot.
It is super easy to throw together because you don't even have to make the crust - and trust me when I say you won't even miss it! I served it to my friend at a picnic in the park one lunch time. She had never heard of quinoa before and loved it. This quiche is a great way to introduce quinoa into your or your family's diet because you don't even notice or taste it (not that it tastes bad!).
Nutritionally speaking, quinoa is a super food. It has an almost perfect ratio of carbohydrates, proteins and fats which means that it is great for those who need more protein in their diets or those looking to lose weight. Quinoa has been described as one of the best sources of protein you can get from a plant source. Quinoa is also considered to be a complex carbohydrate and provides the body with daily fiber, antioxidants and vitamins such as magnesium, iron, copper, phosphorus and B2. Quinoa is also gluten free.
Quinoa can be used as a direct substitute for rice, potatoes, or even pasta. It has a slight nutty flavour and a unique texture.
Feel free to change the vegetables included in the quiche mixture but be sure to put the cherry tomatoes on top - they provide a wonderful sweetness to the quiche.
What you need to serve 4 people:
- 6 eggs
- 3/4 cup Greek yoghurt
- 1/2 cup quinoa
- 1 cup vegetable stock
- 4 mushrooms, thinly sliced
- 2 garlic cloves, minced
- 1 onion, finely chopped
- 1/2 cup parmesan cheese, grated
- 1 tbsp nutritional yeast flakes (optional)
- 1 1/2 cups spinach or kale cut into thin strips
- 1 punnet cherry tomatoes, each tomato chopped in half
- salt and pepper to taste
- butter or oil for cooking (I used coconut oil)
Preheat the oven to 180 C (350 F) and grease a quiche dish with butter or oil. Rinse the quinoa, add to a saucepan and then cover with the stock. Bring the stock to the boil and then reduce to a simmer and cook until all of the stock has been absorbed and the quinoa is cooked.
While the quinoa is cooking, add some oil to a frying pan and saute the onions and garlic until soft and fragrant. Add the spinach and mushrooms and stir until the spinach has just wilted. Set aside to cool.
Whisk the eggs with the Greek yoghurt until frothy. Add the spinach mixture, parmesan cheese, cooked quinoa, nutritional yeast and salt and pepper and mix until well combined. Pour the mixture into the greased quiche dish.
Carefully place the cherry tomatoes seed side up all over the top of the quiche and place it in the oven. Cook for approximately 45 minutes until golden.
Make it Naughty: add some tasty cheese and bacon pieces.
If you would like to see a video on how to cook quinoa, there is a quirky video available here - http://vimeo.com/21870705.

Sources: 1, 2, 3
Wednesday
Spicy Bean and Sweet Potato Burritos

This week I had a bit of a Mexican craving. We have some really great fast food type Mexican places popping up in Australia at the moment, with some of them even having brown rice burritos! However, they still always come covered in cheese and sour cream so I generally try and avoid them for that reason.
Try wrapping them in a large lettuce or cabbage leaf for a healthier alternative to the wrap bread.
What you need to make 8 burritos (halve the recipe for 4)
- 1 1/2 limes, juiced
- 1/2 lemon, juiced (could use lime juice instead)
- 3 tomatoes, finely chopped
- 1 red onion, thinly sliced
- 3 garlic cloves, minced
- 500 g sweet potato, skin on and chopped into 1 cm cubes
- 3 cups cooked black, pinto or kidney beans (1.5 cups dried*)
- 1 cup thinly sliced red capsicum
- 1 cup chopped silverbeet, kale or spinach
- 2/3 bunch fresh coriander, finely chopped
- 2 avocados, flesh removed and roughly mashed
- 8 tortillas
- 1/2 to 1 tsp chilli powder (or cayenne powder)
- 2 tsp dried cumin
- 1 tsp dried coriander
- 1/2 tbsp coconut oil for cooking
- salt and pepper to taste
Optional extras:
- lettuce
- cooked brown rice
- cooked quinoa
- jalapeños
How to make it:
Add the sweet potato to a saucepan, cover with filtered water, bring to the boil then cover and simmer until just tender, around 20 minutes. Drain the sweet potato and set aside.
Prepare your salsa by adding 2 chopped tomatoes, coriander, a pinch of cumin, salt and lemon juice to a bowl and stir to combine. Set aside to allow flavours to develop.
Heat coconut oil in a frying pan over a medium heat. Add the onion and garlic and sauté until soft. Add the capsicum, sweet potato, 1 chopped tomato and spices and stir regularly for around 3 minutes to avoid the mixture sticking to the pan, mashing some of the sweet potato softly so that you have some mashed and some whole pieces of potato. Add the black beans, spinach/kale or silver beet and lime juice and stir until combined and heated through. Add salt and pepper to taste.
Heat tortillas according to packet directions (I didn't bother and they were still great) and then top with some sweet potato mixture, avocado and salsa and roll to combine. See here for a photo demonstration of how to roll a burrito.

Make it naughty: add some grated cheddar cheese and sour cream or yoghurt
* If using dried beans soak overnight in filtered water, drain and then add to a pot, cover with filtered water and bring to the boil and simmer until cooked, topping up the water along the way.
Monday
Lime, Avocado and Yoghurt Cake

As you may know from my previous Carrot Cake post, I am not much of a baker. Keeping this in mind, when I was invited to a friends place for a catchup I quickly scoured the internet looking for something that I didn't have to bake for dessert that would be tasty, healthy and a little bit different.
To my delight I happened across avocado key lime pies made using avocados! I was absolutely thrilled to discover that avocados can be used to make a creamy rich raw dessert.
This recipe has a yoghurt topping which provides some tanginess, however it can be omitted if you are lactose intolerant or sticking to a paleo diet. Cocoyo (coconut yoghurt) and perhaps soy yoghurt (don't quote me on that one - yet to be tested) would be great substitutions. Or you can make less of a base and only use the avocado filling, at which point it will be an avocado lime pie.
Avocados, which are actually a fruit (my boyfriend didn't believe me), contain a range of vital nutrients and healthy fats while being low in sugar and sodium. High in vitamin C, fibre, folate, vitamin K, vitamin E, antioxidants and potassium, it really is a super food.
You can keep the recipe as a cake, or alternatively you can layer it into a round glass placing some base, followed by avocado and yoghurt. Repeat so that you have three layers. Place in the freezer to chill and set slightly for about 20 minutes and serve.

What you need to make one cake (or 4 parfaits)
Total shopping list (see below for breakdown):
- 1 cup sunflower seeds
- 1 cup other nuts of choice
- 1 tbsp coconut flour
- up to 1 cup rice syrup, honey or agave nectar (use honey or agave if you like sweet desserts, rice syrup has half the sugar)
- up to 3/4 tsp stevia
- 1/4 cup coconut oil
- 1/2 cup coconut cream
- up to 6 limes (juice and zest)
- 2 ripe avocados
- 1 cup Greek yoghurt
- 2 tbsp chia seeds
Base:
- 1 cup sunflower seeds (soaked for at least 2 hours then drained)
- 1 cup of nuts, I used a combination of pecans and almonds (soaked for at least 2 hours then drained)
- 1 tbsp coconut flour
- 1/3 cup rice syrup, honey or agave,
- dry or liquid stevia to taste (up to 1/2 teaspoon)
- pinch of salt
- 2 ripe avocados, flesh removed
- 1/4 cup coconut oil
- 1/4 coconut cream
- 1/3 cup lime juice
- lime zest of 2-3 small limes
- 1/3 cup rice syrup or 1/4 cup honey or agave
- liquid stevia to taste (up to 1/2 teaspoon)
- 1 cup Greek yoghurt (or Cocoyo or soy yoghurt)
- 1/3 rice syrup or 1/4 cup honey or agave
- 1/4 cup coconut cream
- 2 tbsp chia seeds
- 1/4 cup lime juice
- lime zest of 2-3 small limes
- liquid stevia to taste (up to 1/2 teaspoon)
How to make it:
Line a spring form cake dish with baking paper.
Place sunflower seeds, nuts, coconut flour, stevia, lime zest and salt into a food processor and pulse into crumbs. Process and slowly add the agave, rice syrup or honey to the mix until the mixture holds together but is still a little bit chunky. Push the dough into the base and sides of the cake tin.
Place all the ingredients for the avocado section of the cake in a blender and blend until smooth, adding more agave, honey or rice syrup and stevia until sweet to your liking. Pour the mix evenly onto the cake crust.
Place all of the ingredients for the yoghurt section into a bowl and mix until combined. It should be a similar consistency to the avocado mixture. Pour evenly over the avocado mixture.
Place in the freezer until just set, around one hour. Slice and serve.
This cake lasts in the freezer for a few days.
This cake lasts in the freezer for a few days.
Wednesday
Meatballs and Zucchinighetti

My partner doesn't cook me dinner very regularly, but when I showed him a recipe for zucchini spaghetti and meatballs I couldn't hold him back.
What you need to serve four lucky people:
Meatballs
- 400g beef mince
- 1 egg
- 1 onion, grated (I used my processor)
- 1/2 bundle of parsley, chopped
- 2 tbsp sweet chilli sauce
- ½ tsp hot chilli powder
- 1 tsp fennel seeds, finely chopped, or 1/2 bulb fresh fennel
- 1 tsp salt
- pepper
Pasta Sauce
Zucchinighetti- 400 g can of tomatoes
- 1/2 cup red wine
- 1 red onion, finely chopped
- 1 fresh red chilli, finely chopped
- 2 tbsp soy sauce (I used tamari)
- 2 tbsp red wine or balsamic vinegar (optional)
- 1 tbsp tomato paste
- 1 tbsp olive oil
- 2 cloves of garlic, finely chopped
- 1/2 bundle fresh basil leaves or 1 tsp dried basil
- salt and pepper to taste
- 4 zucchinis
- Herbs to serve such as parsley or basil
How to make it:
To make the sauce, in a pot add some olive oil, onions, garlic and chilli and simmer over low-medium heat until the onions are soft - around 5 minutes. Add the rest of the sauce ingredients and simmer for as long as possible while making the rest of the meal, stirring occasionally.
To make the meatballs combine all ingredients and mix well. Let the mixture set in the fridge for half an hour.
Using your spirooli or other device, make the zucchinighetti. Don't grate the middle of the zucchini where the seeds are because it is too soft to make noodles. Arrange one zucchini turned into noodles onto each plate.
Heat some oil in a large frying pan over medium heat. Shape one tablespoon of meatball mixture into a ball by rolling it in your hands and placing it onto the pan, repeat with the rest of the meatballs. Cook them on each side for around 5 minutes or until they have browned and are cooked through.
Once the meatballs are almost ready blend the tomato mixture using a hand held blender and add extra water if it is too thick. Add salt and pepper to taste.
Top the zucchini spaghetti with hot tomato sauce, meatballs, olive oil, your choice fresh herbs and some parmesan cheese.
Top the zucchini spaghetti with hot tomato sauce, meatballs, olive oil, your choice fresh herbs and some parmesan cheese.
Thursday
Coconut and Almond Pancakes

As promised, here is my coconut and almond pancake recipe, which has absolutely zero bananas in it unlike my 3 Ingredient Paleo Pancakes. They are still wheat free, dairy free, gluten free and refined sugar free (it can be completely sugar free and Paleo by omitting the maple syrup).
The addition of blueberries as a replacement for bananas adds the desired sweetness. These pancakes are also much thicker than the 3 Ingredient Paleo Pancakes. Feel free to make them thinner using more coconut cream, however be extra careful when flipping them as they will be more likely to fall apart.

What you need to make 8 pancakes:
- 1/2 cup coconut flour
- 1/2 cup almond meal
- 1 tsp baking powder
- 1-2 tbsp maple syrup (optional)
- 1/2 punnet fresh or frozen blueberries (if using frozen defrost and discard liquid)
- 5 organic eggs
- 1/3 cup coconut cream (or other milk such as almond milk or oat milk)
- coconut oil for frying
Topping suggestions:
- butter
- maple syrup
- strawberries and stevia - see 3 Ingredient Paleo Pancakes for recipe and photo
- fresh banana
- chopped nuts such as walnuts
- almond butter
- coconut cream
- ice cream
Mix the eggs, maple syrup and coconut cream together in one bowl. Mix the flour, almond meal and baking powder in a separate bowl. Mix the dry and wet ingredients together and then fold in the blueberries.
Heat a non-stick frying pan or skillet over low heat and add some coconut oil to coat the pan. Add 1/4 cup of the pancake mixture to the pan. I find the easiest way to do this is to measure 1/4 cup and then roll it into a ball in my hand and then flatten in the pan with my hand. After a few minutes carefully flip the pancake over and cook the other side.
If you are making a big batch I suggest having a couple of pans going at the same time. Cook about 3 - 4 pancakes per pan and keep warm while under some aluminium foil while cooking the others.
Substitutions: almond meal can be substituted with any other nut flour. Blueberries can be substituted with other fruit. Coconut cream can be substituted with any other kind of milk.
Make it naughty: cover with almond butter and the strawberry topping, it tastes just like peanut butter and jelly
Paleo Pancakes - Using Three Ingredients

There has been a lot of buzz lately surrounding the Paleo (short for Paleolithic) diet. Essentially it it is a caveman diet consisting of meat and other hunter/gatherer type foods:
"presumed ancient diet of wild plants and animals that various hominid species habitually consumed during the Paleolithic era—a period of about 2.5 million years duration that ended around 10,000 years ago with the development of agriculture."1
On the Paleo diet you only eat grass-fed pasture raised meats, fish, fruit and veg (including root vegetables like potatoes) and nuts. You are not allowed to eat any grains, legumes, dairy products, refined salt, refined sugar or processed oils.
I am mainly a veggie eater so could never follow a strict Paleo diet but I do like the idea of trying to reduce the amount of grains, dairy products and refined/processed foods/oil that I consumes so I have been looking at Paleo recipes for the last couple of weeks. My Thai Chicken Burgers could easily be made Paleo by replacing the breadcrumbs with almond meal.
One of the recipes I came across is Paleo Pancakes using only three ingredients - egg, banana and almond butter. I love eggs, banana and of course my precious nut butter (on how to make it - see my Nut Butter post), so this seemed like a winning combo.
After reading lots of comments where people had problems making their pancakes (they would crumble and fall apart), I gave it a go being very careful to cook it on a low temperature and turn carefully after around 3-4 minutes. The results were wonderful!
I have a warning for people who don't like cooked banana i.e. banana bread - you won't like these pancakes. My friend who came over to help me make them didn't like the banana so I made an big batch using more eggs, coconut flour and almond meal to mask the flavour of the banana and they eventually also turned out well after a bit of experimenting.
My partner and I ended up eating the leftovers during the week as a high protein snack topped with blended strawberries and stevia and more nut butter - it was like eating peanut butter and jelly pikelets!
What you need to make 2 pancakes:
- one ripe banana
- one organic egg
- one tbsp almond butter
- coconut oil for cooking
For the topping:
- strawberries
- a few drops of liquid stevia
- 1tsp lemon juice
- blueberries (optional)
- maple syrup (optional)
- coconut cream (optional)
Add all of your ingredients for the pancakes to a blender and blend until smooth. Let the pancake batter sit until it is no longer bubbling. Add a small amount of coconut oil to a non-stick frying pan over low heat. Give the batter a quick stir then add a small amount of batter to the pan. You need to make these pancakes small or you can't flip them - they are more like a pikelet size. Wait 3-4 minutes and then carefully flip them over and quickly cook the other side. I find I can do three in the pan at once if I am making a big batch.
While your pancakes are cooking blend some strawberries and stevia until you have a sauce.
Serve the pancakes with the strawberry sauce and coconut cream (optional), or some maple syrup. YUM!

If anyone is interested in the not-so-bananery version of these pancakes please let me know and I will do a follow up post x
Thai Chicken Burgers

These chicken burgers with Thai inspired flavours are the best chicken burgers I have ever eaten (if I do say so myself). The photos definitely do not do them justice!
These burgers are great on a bread roll, in a wholemeal wrap or wrapped in something like a big lettuce leaf or a blanched cabbage leaf. I personally prefer the cabbage leaf to a bread roll and even managed to convince my partner that it is better as well!
I do most of the preparation for the burger patties in a food processor or blender, including making the chicken mince from chicken breast and the breadcrumbs from some lightly toasted bread. Everything in this recipe can be chopped in the processor.
Try some additional toppings like bean sprouts, grated cucumber or crushed peanuts - yummm.
For the patties:
- 500g chicken mince
- 2 cups fresh breadcrumbs
- 2 green chillies, finely chopped
- 1 egg
- 1/2 cup finely chopped coriander (cilantro) (I used almost a whole bunch)
- 3 spring onions, finely chopped
- 2 tbsp sweet chilli sauce
- 2 tbsp soy sauce (I used gluten free organic tamari - a stronger soy sauce)
- 1 tbsp fish sauce
- 1 carrot, grated
- 6 tbsp natural plain yoghurt (I used Greek)
- 3 tbsp sweet chilli sauce
- 2 sliced tomatoes
- handful torn lettuce leaves (or lettuce mix)
- other options - chopped roasted peanuts, bean sprouts
For the bun:
- 6 wholemeal bread buns OR 6 large lettuce leaves OR 6 large cabbage leaves quickly blanched until they are just soft and bend easily (I used savoy cabbage)
What you need to do:
If using a processor:
- process the bread into breadcrumbs
- process the spring onions, green chilli and coriander together until finely chopped
- process the chicken into mince
If you aren't using a processor you will have to chop everything by hand.
Add all of the ingredients for the chicken patties together in a bowl and mix. Form into 6 patties with your hands (around 120g each). If you have time, put the patties in the fridge for an hour to develop the flavours.
Preheat a grill with some oil over a low-medium heat for around 5 minutes each side.
Serve on your choice of 'bun' and top with your choice of toppings.
Make it naughty: top the cooked patties with cheese and give them a quick grill.

Creamy Avocado Spaghetti

This recipe has been repeated on a number of websites, but the original is from a wonderful vegan blog called Oh She Glows.
I am absolutely obsessed with avocados and usually have a half of one every day. Blend them up with some herbs, lemon juice and olive oil and hey presto – you have yourself a yummy creamy pasta sauce or dip! On the health side of things, avocados are full of wonderful (non-fattening) good fats, fibre, vitamins and minerals*.
The brilliant part about this recipe is that it takes about 15 minutes in total because you blend the sauce while the pasta is cooking.
Don’t have a blender or processor? Just mash the avos and then mix with the other ingredients.
Feel free to use any type of herb that takes your fancy, add some roasted nuts or roasted cherry tomatoes. I know that when I make it next I’m going to use fresh dill from my Dad’s garden plus a juicy fillet of salmon.
Try swapping lemons for limes or throw some fresh chilli, jalepenos, capers or anchovies into the blender with the sauce mixture – I’m sure they would all be great!
Try swapping lemons for limes or throw some fresh chilli, jalepenos, capers or anchovies into the blender with the sauce mixture – I’m sure they would all be great!
What you need to serve 2 lucky people (double for 4 people):
- 1 - 2 ripe avocados, flesh removed ( I used 1 1/2- add more avocado if you like your spaghetti really creamy)
- the juice of 1 small lemon (about 2 tbsp)
- 2-3 tbsp good quality olive oil
- 1/4 cup basil leaves, or other herbs of choice i.e. coriander (cilantro), parsley or dill
- 1/4 baby spinach leaves (optional)
- spaghetti to serve two (around 200g), I used organic wholemeal pasta, try out different varieties like spelt, brown rice, kamut etc.
- sprinkle of cayenne pepper
- salt and pepper to taste
How to cook it:
Bring a large pot of water to the boil. Once boiling add a sprinkling of salt and the pasta and cook the pasta according to packet directions. While the pasta is cooking add all the ingredients for the sauce to a blender (cayenne, avocado, olive oil, lemon juice, basil and spinach) and blend until combined and creamy. Add salt and pepper to taste. Once the pasta is ready drain most of the hot water keeping a couple of tablespoons of water in the bottom of the sauce pan to mix in with the sauce. Add the sauce to the pasta and toss to combine over a low heat. Plate it up and serve.
Make it naughty: Serve with grated parmesan cheese or add some chopped crispy bacon.
Make it paleo: Serve with zucchini noodles instead of spaghetti (see My Recipe Here)
Make it paleo: Serve with zucchini noodles instead of spaghetti (see My Recipe Here)

* Each serving also has eight percent of the daily value of vitamin K, seven percent of the daily value of folate, and four percent of the daily value of vitamins C and E as well as several B vitamins: B6, pantothenic acid, niacin and riboflavin. Avocados also have four percent of the daily value of potassium, two percent of the daily value of the B vitamin thiamin and two percent of the daily value of magnesium. Read more: http://www.livestrong.com/article/443036-what-are-the-health-benefits-and-nutrients-of-avocados/#ixzz28JA3ztWu
Monday
Greek Baked Eggplant

Following our trip to Scotland we headed over to Greece for a week of sun - specifically Santorini and Mykonos. In my attempt to stay healthy while on holidays I ordered baked or grilled eggplant on a number of occasions. Each bite was a slice of heaven as I indulged in the flavours of the earthy eggplant and rich tomato sauce, swiftly followed by a sip of rose wine.
Sometimes the eggplants would come covered in cheese, whether it was parmesan or fetta (or both) and sometimes they would be topped with some fresh tomatoes, raw red onion and lettuce (you add vinegar and oil yourself).
The eggplants, tomatoes and absolutely EVERYTHING else grown in Greece (particularly from the volcanic soils of Santorini) were absolutely out of this world. Unfortunately I only had Aussie eggplants to contend with for my re-creation, none-the-less I think the result is still delicious.
Serve the eggplant with a basic Greek salad consisting of wedges of tomato, peeled and sliced cucumber, thinly sliced green capsicum, a few black olives, capers, small amount of cos lettuce, fetta, dried or fresh oregano and a splash of vinegar and olive oil.
What you need to serve 4 lucky people:
- 2 large eggplants
- 1 red or white onion, chopped
- 1/4 cup basil, finely chopped (optional)
- 2-3 garlic cloves, finely chopped
- 1/3 cup dry white wine or a dash or white wine vinegar
- 2 x 400 ml tins of organic chopped tomatoes (or around 8 very ripe fresh tomatoes)
- 1 tbsp dried oregano
- Large handful of fetta, crumbled (goats or ordinary Greek fetta)
- 1 tsp all spice (optional)
- 2-3 tbsp olive oil
- 1/2 lemon, cut into 4 wedges for serving
- Handful of flat-leaf parsley, chopped to serve
- Salt and pepper to taste
- Preheat the oven to 200 °C (or 180°C fan forced). Slice the eggplants in half length ways. Score the flesh on a 45 degree angle about 5 mm apart, then repeat going the other way making a diamond pattern on the eggplants. Brush the eggplants with olive oil on both sides, sprinkle with salt and bake in the oven for around 30 minutes or until the flesh is soft and golden in colour and the eggplant has started to collapse.
- Heat 1 tbsp of olive oil over a low-medium temperature, add onion and garlic cloves and cook until soft. Add the white wine and simmer until the liquid has reduced by half. Once the wine has reduced add the chopped tomatoes, oregano, all spice and basil and simmer with the lid on the pot for around 20-30 minutes or until sauce has thickened. Add salt and pepper to taste once the sauce has thickened.
- Once the eggplants are ready, spoon 1/4 of the tomato mixture onto each piece and put back into the oven for 10 minutes.
- If you are having fetta, sprinkle some on the eggplant at the end and put under a grill for a couple of minutes or until the fetta is soft and heated through. Drizzle the eggplants with olive oil and scatter some parsley once you have plated it up. Serve with a Greek salad or other salad of your choice.
Make it naughty: add some freshly grated parmesan and/or mozzarella cheese and quickly place under the grill during the last step of the recipe. Serve with some fresh bread to mop up the sauce and a glass of red wine like the Greeks do.
Notes: This dish is fantastic heated up the next day. Putting the sauce and cheese in the oven for 10 minutes at the end is optional - it still tastes amazing if you don't. Feel free to add some grated or finely chopped vegetables to the sauce towards the end of cooking e.g. zucchini or carrots
Tali's Tasty Brekkie Tatties (Black Pudding Optional)

During my time in Scotland with my partner's friends and family I was fortunate to eat a few local delicacies that I wouldn't normally eat at home such as local smoked salmon pate, black pudding, haggis, cheese and oatcakes from the Isle of Arran (a wee island off the west coast).
I wanted to post a recipe that is traditionally Scottish but instead came up with this healthier, modern twist on a Scottish breakfast which can be eaten without the black pudding if preferred. Black pudding is normally part of a full Scottish breakfast (as well as beans, square sausage, a white roll, mushrooms, broon sauce and scrambled eggs) but the combination with sweet potato is by no means traditional. The sweet potato tower was inspired by the Veggie & Egg Tower of Power at My New Roots.

The one thistle we saw on our walk up the mountain Goatfell on the Isle of Arran
What you need to serve 4 lucky people:
- 500g sweet potato
- 4 slices of black pudding (optional)
- 4 organic free range eggs
- 2 red onions, thinly sliced
- 200g cherry tomatoes, sliced in half
- 1 tbsp vinegar
- 2 cups baby spinach (optional)
- Coconut oil or grapeseed oil
- Salt and pepper
How to cook it:
Pre-heat the oven to 200 degrees. Cover two large baking trays with baking paper (gas mark 5). Toss the sweet potato and tomatoes in a small amount of oil and salt and pepper. Place the sweet potato on one tray and the black pudding and tomatoes on the other. Cook the potato, tomatoes and black pudding in the oven for 20 minutes or until the potato is soft.
In a frying pan add some oil and gently cook the onions for 15-20 minutes. Once the onions have caramelised turn off the heat and stir in the spinach to allow it to wilt slightly.
Bring a saucepan of water to a gentle boil. Add the vinegar and gently stir. Crack an egg into a tea cup and carefully slip the egg into the water. Gently stir the egg white around the egg with a spoon. Repeat with the other eggs. Simmer the eggs for 4 minutes then carefully remove them with a slotted spoon onto some paper towel to drain.
Assemble the plates by layering the black pudding followed by a few slices of sweet potato, topped with some onion mixture and a poached egg. Surround by cherry tomatoes and sprinkle with salt and cracked pepper.
Make it naughty: add some crispy bacon.
Variations: replace black pudding with salmon, avocado or chorizo, add some mushrooms to the onion mixture, squeeze some lemon juice over the stack at the end and add a glug of extra-virgin olive oil.

Steve, Sara and I at the 'top' of Goatfell
Vietnamese Pancakes (Banh Xeo)

I stumbled upon these Vietnamese pancakes, called Banh Xeo which literally means 'sizzling cake', when going through my Yotam Ottolenghi vegetarian book which I bought on a whim about a year ago. Some of his recipes are a little too cheesy (as in too much cheese in the recipe!) for my liking but these pancakes resonated with me with all of the fresh flavours in the sauce and herbs plus a tonne of crunchy vegies (I added a lot more than the original and authentic recipes).
After I had made them I spoke to my friend Y-Linh and she said that her Vietnamese mum makes them all the time... if only I had known ahead of time I could have picked up some pancake cooking tips! I must say, after eating them I am absolutely besotted with them. With all the raw vegies they are like a yummier warm version of Vietnamese rice paper rolls.
The version I have posted is vegetarian and tofu free but you can easily add some cooked pork belly, prawns, tofu or chicken and they would be even more delicious. They are supposed to be served as soon as they are cooked but I wanted to eat them as a sit down meal so I set them aside under some foil to keep them warm, resulting in not so crispy pancakes but they were still really delicious.
What you need to serve four lucky people:
Pancakes:
200g organic brown rice flour (or white rice flour if you can't find brown)
400ml tin of organic coconut milk (or a smaller tin of cream + the remainder as water)
3-4 cup of filtered water
1 tbsp grapeseed or coconut oil
2 eggs
Dressing:
40 ml lime juice
1 1/2 tbsp seasame oil
1 tbsp brown sugar (optional - I used organic molasses sugar)
1 tbsp rice wine vinegar
1 tbsp sweet soy sauce (kecap manis) or fish sauce
2tsp freshly grated ginger
1 frsh red chilli, finely chopped
1 garlic clove, crushed
1/2 tsp salt
Vegetables:
Any mixture of fresh and cooked thinly sliced vegetables would be good. I used:
Handful thinly sliced mushrooms
Bok choy stems and leaves thinly sliced 1 large green chilli, sliced (optional)
2 carrots thinly sliced
1 red capsicum thinly sliced
2 cups bean sprouts, rinsed
2 spring onions thinly sliced
Bunch of coriander roughly chopped
Bunch of mint roughly chopped
How to cook them:
Prepare all of the vegetables (and meat if you are using meat) and set aside.
If you are adding cooked vegetables saute them briefly in some grapeseed oil in a pan over medium heat and set aside once cooked. I sauteed the bok choy and mushrooms and covered to keep warm while I made the dressing and pancakes.
Mix all of the ingredients for the sauce together and shake (hint: I like to use old jars as salad shakers). Add the rice flour, eggs, turmeric, coconut milk and 2 cups of water to a bowl and stir well. If the mixture isn't runny and thin add some more water until it is. You might need to keep doing this as you are cooking the pancakes as it will thicken upon standing.
Heat a non-stick frying pan over medium-high heat and add some oil. Swirl the oil around the pan so that it is completely covered. Using a ladle spoon the pancake batter over the frying pan so that it is completely coated in a thin layer. Don't be scared of the sizzling sound! Once the pancake is crispy on the bottom you can either attempt to flip it to cook the other side (which I did) or you can put a lid on for a short amount of time to cook the top side. Remove the cooked pancake and set aside under some foil to keep warm.
Once all of the pancakes are cooked serve them with the vegetables and sauce and allow people to fill them with their own mixture. The sauce is great added on top of the vegetables inside the pancake and then over the top of the pancake.
Make it naughty - add some poached pork belly
On a side note, I am off to the UK and Greece tomorrow for a few weeks but hopefully I will have time to make something to post while I am there- maybe some vegie haggis?
Tuesday
Crispy Polenta and Vegie Stack with Fetta & Aioli

First of all, I would just like to say sorry for the hiatus from my blog for anyone who is following. Unfortunately my beautiful mother passed away a few weeks ago and her loss has been devastating. She did, however, love this blog which was inspired by her incredible strength, determination and radiant inner and outer beauty on her path to achieving perfect health.
After such a quick recipe last time I thought I would give everyone something that requires a little more effort, then I will go back to simple...I promise.
This recipe was inspired from a lovely dinner I had with my vego friend Sara at Vue restaurant in New Farm. Their version had a LOT of aioli and spun beetroot sugar which was delicious but also very naughty so I decided to have a go at making a healthier version.
I have never cooked polenta (corn grits) before and didn’t know how wonderful it is. Polenta is made from yellow corn which is packed with carotenoids. Carotenoids are powerful antioxidants that protect the cells of the body from damage caused by free radicals and help with the function of the immune system. Carotenoids need to be eaten with some healthy fat to be absorbed by the body.
You can do so much with polenta including setting and frying/grilling it like I have done in this recipe or you can add a bit more stock (or water) and make a lovely smooth accompaniment to some green veg, mushrooms or meat. Just stir through a little bit of butter and/or some parmesan cheese at the end for a lovely rich flavour.
It is really important to make sure you try and purchase organic polenta because organic corn is non-GMO (genetically modified) and does not contain any harmful pesticide residues, like non-organic corn does.
There are a number of steps to this recipe so it may be best suited to a weekend dinner party or romantic meal for two. You can turn the leftovers into a delicious salad by ripping up the polenta into bite sized pieces. I recommend that you prepare the polenta up until the frying point the day before if possible.
What you need to serve four lucky people:
For the polenta:
1 cup organic polenta (corn grits)
3 cups of vegetable stock (or water)
Handful of fetta or ½ cup grated parmesan cheese
For the vegetables:
1 red capsicum, cut into 2 cm pieces
1 bunch asparagus spears wooden ends removed or other tasty crunchy veg (I used white butter string beans because I had some)
Large handful baby spinach leaves
1 medium sized beetroot
200g pumpkin, chopped into thin slices for roasting (I left the skin on and also roasted the seeds)
1 tsp agave or honey (optional)
Handful of fetta
1/2 tbsp grapeseed oil for roasting and for frying
Salt and pepper
For the Aioli Dressing*
1 egg yolk (at room temperature)
1 tsp Dijon mustard (at room temperature)
Up to 1/3 cup mild olive oil or grapeseed oil
Juice of half a lemon (at room temperature)
*(or if low on time, mix mayonnaise with some lemon juice)
Step 1: Make the polenta
Place the water into a saucepan and bring to the boil. Slowly pour in the polenta in a steady stream, whisking to prevent clumping. Continue to stir for a couple of minutes and reduce the heat to a simmer. Cover and cook over low heat for 20-30 minutes stirring occasionally, about every 5 minutes. If the polenta starts to clump add some more water and whisk to thin it out (about ½ a cup at a time). When the polenta is cooked (rub between fingers and make sure it is no longer gritty) and has thickened remove from heat, stir through the crumbled fetta and spoon into an oven proof dish to cool. Smooth the polenta over the top with the back of a spoon. A rectangular or square dish is best for setting the polenta - make it as thin a layer as possible. Once it has cooled slightly cover and place in the fridge to set – this may take a few hours.
Step 2: Put the vegies in the oven
While the polenta is setting, pre-heat the oven to 180 degrees. Wash and scrub the beetroot and cover it in foil. Place in the oven for approximately 30-40 minutes. Once the beetroot has cooked take it out of the oven, cool slightly, peel and then cut into thin slices just before serving.
Toss the prepared capsicum, pumpkin and seeds in grapessed oil, agave and salt and pepper and place flat on an oven proof dish or tray. Place the tray in the oven for approximately 20-30 minutes or until the vegetables and nice and soft.
Step 3: Make the aioli
In a food processor or blender: blend yolk and mustard until a smooth paste has formed. While the motor is running slowly add the oil in a thin stream and continue blending until the aioli has thickened. Stir through the lemon juice. If the mixture is too thick you could add some water to thin it out.
By hand (like I did – in hindsight I should have used the blender :-/): add yolk and mustard to a bowl and then vigorously whisk until a paste has formed. Add one drop of oil at a time, whisking between each drop, until the aioli starts to thicken. Then you can add the olive oil in a steady stream while still whisking. Stir in the lemon juice. TIP from the movie Julie and Julia – submerge the bowl in some warm water for a couple of minutes before you start to heat it up, it should make it easier.
Step 3: Fry the polenta
While the vegies are in the oven, turn the polenta out onto a cutting board. It should be completely molded into the shape of the oven dish. Cut into thin squares (around 8 cm square). Heat a frying pan over medium-high heat and add some grapeseed oil. You may want to test a small amount of polenta to see how it cooks first. Cook each side for around 10 minutes until brown and crispy on the outside. Be careful not to move the polenta around or overcrowd the pan.
Once you have cooked all the polenta squares place them on some paper towel and cover to keep warm.
Step 4: Blanch asparagus
Place asparagus in a glass bowl and pour boiling water over them for approximately 20 seconds until bright green and the raw edge has been taken away. Drain and rinse in cold water to stop them cooking.
Step 5: Plate up
Place a square of polenta on each plate followed by ¼ of each of the vegetables in a stack. Top with some baby spinach leaves,1 tbsp of aioli, a sprinkle of fetta and the roasted pumpkin seeds.
Variation: add some crushed garlic to your aioli.
Make it naughty: add a tbsp of butter and parmesan cheese to your polenta to make it extra creamy.
Tabouli - Simple and Delicious

My partner and I found the most wonderful Syrian restaurant in Shepherds Bush during our brief stint living in London where we gorged on cheap, filling mezzes.
Having only ever bought tabouli pre-made from Coles along with my regular dolmades (lazy I know), I decided to make it myself when I got back to Australia. Tabouli (tabouleh) is a Levantine Arab salad traditionally made with bulgur, tomato, parsley and mint, seasoned with olive oil and lemon juice.
I have made a few different varieties of tabouli because you can make it with non-traditional ingredients like couscous, quinoa and coriander, but in my opinion the recipe below is the best I have tried. Soaking the bulgur in ground cumin makes such a difference.
If you want to try something different or want to beef it up to make a large salad, toss in some cooked beans or lentils (such as adzuki beans or chickpeas), try quinoa instead of the bulgar to be gluten free, coriander instead of the parsley or mint (or any combination you like), try cherry tomatoes instead of tomatoes, add other vegetables like lettuce and red cabbage, add some cooked free range roasted chicken and top with a nut medely, goji berries, crumbled falafel or some roast sweet potato.
I like to eat mine as part of a mezze with other dips and some flat bread, or as part of a wrap or salad for lunch with some home made baked falafel drizzled in yoghurt.
Nutritional Benefits: Parsley contains fibre, vitamins and minerals like potassium, calcium, manganese, iron, and magnesium. It is also rich in many antioxidant vitamins including vitamin-A, beta-carotene, vitamin-C, vitamin-E, zea-xanthin, lutein, and cryptoxanthins. The herb is also an excellent source of vitamin-K and folate. Bulgur wheat does contain gluten, but offers similar amounts of nutrients as quinoa per calorie. Bulgur contains a high amounts of fibre.
What you need to serve a group as a mezze or delicious kebab:
1 big bunch of parsley (I prefer curly for tabouli), large stems removed and the rest finely chopped
1 small bunch of mint, leaves removed and finely chopped
2 tomatoes, finely chopped
2 spring onions, finely sliced
1/3 cup fine cracked bulgur
2 tsp ground cumin
Juice of 1 large lemon
2 tbsp olive oil
Salt and pepper
How to make it:
Mix the bulgur and cumin in a bowl and cover generously with water. Let sit for 45 minutes and add more water if necessary as the bulgur expands. While the bulgur is resting, add parsley, mint, tomatoes and spring onion to a large bowl. Mix together the lemon juice, olive oil and a pinch of salt and pepper then add to the parsley mixture. Drain the bulgur, add to the parsley mixture and mix well. Set aside to allow the flavours to develop while you prepare the rest of your mezze.
Make it naughty: enjoy it with some grilled halloumi - yum!
Sources: 1, 2, 3
Monday
Carrot Cake for Australia's Biggest Morning Tea - Gluten, Sugar and Dairy Free

Our team at work received an invite to attend Australia's Biggest Morning Tea at our previous office to raise money for the Cancer Council. Following this I decided to host my own ABMT at our office, and then I had a panic attack... I can't bake! I tried to make my partner some scones one day and they turned out more like pretzels. I have no idea how it happened!
So, following my original freak out I decided that I would make something healthy. There are so many amazing bloggers out there who are making vegan, gluten free and sugar free treats. During my search I came across Lee from Supercharged Foods and saw a recipe for a gluten free, sugar free, dairy free carrot cake. Following this I did a quick google search for a regular carrot cake recipe only to be shocked to discover the recipes have two cups of sugar in the cake, let alone the icing!
I ended up adding raisins to the recipe and made two healthy carrot cakes. The result was wonderful, everyone raved about it. Best of all we ended up raising $120 for the Cancer Council, who provide such a wonderful service for people with cancer and those who are close to someone who has/had cancer. I know my mum has called the helpline on a couple of occassions.
What you need to make one cake:
- 1 1/2 cups of gluten free flour of your choice i.e. almond flour (you can use regular flour if you are not avoiding gluten)
- 1/2 cup chopped walnuts
- 1/2 cup dried raisins, soaked for half an hour until plump
- 1 teaspoon baking powder
- 1 teaspoons bicarbonate of soda
- 1/4 teaspoon sea salt
- 1 teaspoon ground cinnamon
- 1/2 teaspoon grated nutmeg
- 3/4 teaspoon stevia powder (or 9 drops of stevia liquid)
- 2 eggs, beaten
- 3 tablespoons grapeseed oil
- 4 tablespoons coconut cream
- 1 1/2 cups (200 g) grated carrot
- 3/4 cup of raw or dry roasted cashews
- 250 g coconut cream
- The zest of one lemon, finely grated
- The juice of half a lemon
- 5 or 6 drops of stevia (to taste)
- Preheat the oven to 170°C and grease a round cake tin with grapeseed oil.
- In a bowl sift the flower, baking powder and bicarbonate of soda, add the walnuts, salt, cinnamon, nutmeg and stevia (if powdered), and stir to combine.
- Put the eggs, grapeseed oil and coconut cream in a separate bowl and whisk together. Add with the raisins to the dry ingredients and fold through.
- Squeeze the excess water out of the carrots with your hands and add them to the bowl. Fold in lightly. Spoon the mixture into the prepared tin and bake for 45 minutes, or until the cake springs back when pressed in the centre. Take out of tin and place on a wire rack to cool.
- For the icing, place all ingredients minus the stevia, including just half of the coconut cream into a food processor or blender and turn on and off for a few minutes, slowly adding more coconut cream until the consistency is like crème fraiche (not runny, but not like thickened cream- you will see when I took the photo above it was a little bit runny, once I added some more cashews it thickened up significantly). Add the liquid stevia once you have the desired consistency and give it one last quick blend. Place the icing into the coldest section of your fridge (or freezer) to thicken.
- When the cake has cooled, spoon the icing all over the top.
Make it naughty: there is no need it is tasty enough! You can add more stevia to the icing to make it sweeter.
Info on stevia: http://en.wikipedia.org/wiki/Stevia
 |
| To host your own Biggest Morning Tea or donate to the Cancer Council go to http://www.biggestmorningtea.com.au/?gclid=CIe3qcDSpLACFU1spAodyywuWg |
Wednesday
No-Fuss Pumpkin Barley Risotto
.jpg)
My love for pumpkin risotto started when I was working at Sizzler during my years at uni, always getting it at the bargain cost of around $2 a serve. This barley risotto is one of my favourite mid-week recipes. It is easy to prepare, you hardly have to stir it unlike regular risotto, it's healthy because I use pearl barley* instead of arborio rice and it's incredibly tasty. I actually prefer it to regular risotto because of the chewy texture of the barley.
- 2 cups pearl barley
- 1 tablespoon coconut oil, ghee or grapeseed oil
- 1 leek, white and light green part finely chopped
- 1/2 brown onion, finely chopped
- 1 clove of garlic, minced
- 1 carrot, finely chopped
- 1 cup (250ml) dry white wine or 1 cup of vegetable or chicken stock
- 350 ml of vegetable or chicken stock (this stock is in addition to the wine or stock above)
- 1 kg pumpkin (any kind) skin removed and diced into 1cm cubes (keep the skins and seeds for roasted pumpkin skin chips - simply coat in a small amount of oil, curry powder, salt and pepper and roast for 10 minutes)
- 2 tbsp chopped parsley to serve
Optional:
- 2 tbsp freshly grated parmesan cheese stirred through at the end
- Handful of crumbled goats fetta (or other fetta) sprinkled on top at the end
- Handful of baby spinach stirred through at the end
- Teaspoon of butter stirred through at the end
How to cook it
Thoroughly rinse the barley and set aside (soak up to 12 hours if you have time). Heat the oil in a saucepan over medium-high heat then add the leek, onion and garlic and cook for a couple of minutes stirring occasional until soft. Add the white wine or stock and the barley and simmer until the liquid has been almost completely absorbed, around 5 minutes. Add the stock, pumpkin and carrot, pop the lid on and simmer for around 30 minutes stirring occasionally to stop it from burning until the stock has been absorbed and the barley is cooked but still a little bit chewy. If there is too much liquid take the lid off and cook for a further 5-10 minutes. Stir the risotto vigorously so that the pumpkin is mashed and thoroughly coating the barley.
Note: if you are using organic barley it may need some additional liquid and cooking time as I have found it to be less processed than the supermarket variety
Season with salt and pepper, stir through the parmesan cheese or butter (optional), sprinkle on some freshly chopped parsley and goats fetta cheese (optional) and plate it up. I like to serve it with a spinach and green bean salad.
Be naughty
Sprinkle some fried bacon or prosciutto over the top when plating it up.
Dinner party tip
Serve the risotto on a roasted round of pumpkin (this will be in addition to the pumpkin you use for the risotto).
Variations
Use rice instead of pearl barley if you are gluten intolerant. If you don't like pumpkin use cauliflower instead.

*Note re Pearl Barley: This grain is packed with fiber, contains important vitamins and minerals, is slim on fat, is cholesterol-free and contains antioxidants ("aunty-who?" for those of you who remember that the advert trying to get people to drink more coffee). Barley contains several vitamins and minerals including niacin (Vitamin B3), thiamine (Vitamin B1), selenium, iron, magnesium, zinc, phosphorus and copper. Source 1, 2.
Sunday
Nut Butter

I first discovered there was more to life than regular peanut butter last year at the Ekka (Brisbane's Royal Show). This was Steve's (my partner) first trip to the Ekka so of course Steve indulged in dagwood dogs (a battered sausage on a stick covered in tomato sauce), I made him watch horses, we drank some wine and patted small furry animals.
Whilst in the wine pavilion tasting all of the regional goodness, we stumbled along the Macro wholefoods stand. Because it was the last day of the show they were basically giving away raw nibble mix and different types of nut butters - almond, almond cashew & brazil nut etc. We were immediately excited by the prospect of other types of nut butter and have never bought peanut butter since.
What I didn't realise at this time was how easy it actually was to make nut butter and have seen it pop up on lots of the blogs I follow lately. You literally just roast or soak the nuts (for raw nut butter) and then blend. Obviously you can make your nut butter as fancy as you would like by adding things like extra virgin coconut oil for a silky texture, cashews, almonds, chia seeds, sesame seeds, hazelnuts, walnuts, brazil nuts, hemp seeds, maple syrup, agave nectar, honey, cinnamon, cocoa... yummmmmm.
I usually like to enjoy my nut butter with organic brown rice crackers for a quick snack at work along side my mid morning green tea, on rye toast for a really quick breakfast or as a dip for carrots and celery. I have also taken to trialling out a few 'bliss balls' for myself and the boys (aka my brother and partner) to have as a pre-workout snack, and am also going have a go at making some healthy nut butter biscuits which is both super exciting and scary at the same time because my baking skills are not the best!
Some quick nutritional facts - peanuts are not quite as good for you as say almonds. Both nuts contain similar nutritional benefits such as monounsaturated fats, vitamin E, protein and manganese. However peanuts are linked to allergies and may contain added sugars and oils. There is also some concern that peanuts contain levels of aflatoxin, a toxin that has been linked to cancer.
What you need to make 1-1.5 cups of nut butter
- 2 cups made up of any type of shelled/raw nuts and seeds - cashews, almonds, chia seeds, sesame seeds, hazelnuts, walnuts, brazil nuts, hemp seeds
- 1 tsp of sweeter if desired - agave nectar, honey, honey, cinnamon, cocoa, vanilla essence, salt (optional)
- 1 tsp extra-virgin coconut oil (optional)
- preheat the oven to 150°C (fan forced, 170°C conventional). Scatter the nuts across some baking paper on an oven tray. Roast for approximately 10 minutes or until the nuts are a caramel colour on the inside. if you have smaller nuts/seeds add them in towards the end. Keep an eye on the nuts after 8 minutes, they burn quickly. Once the nuts are ready take them out of the oven and let them cool (this should take around 5 minutes).
- once the nuts have cooled completely put all of the ingredients into a food processor or blender and whizz until it forms a powder and then a paste (should take around 10 minutes), scraping down the sides of the bowl every once in a while. You can tell it is ready when the oil starts to separate from the nuts.
- spoon out into a sterilised jar*.
.jpg)
Not quite yet nut butter...

Looking more like nut butter!
Tip - If you want chunky nut butter, remove 1/4 cup of the chopped nuts from the food processor before it turns into a powder. Set aside. Fold it to the creamy nut butter before storing.
Make it naughty: by eating too much of it!!
*The easiest way I have found to sterilise a jar is to clean it out thoroughly and boil it a saucepan of water for 5 minutes.
Sources of info re the nuts:1, 2, 3
Subscribe to:
Posts (Atom)


